Knight Cat AI Video TikTok: 9:16 Vertical Posting Guide
 Knight Cat AI Team
How to take a Knight Cat AI render to TikTok: vertical 9:16 framing, opening half-second choices, caption placement, safe zones and how the MP4 download works.
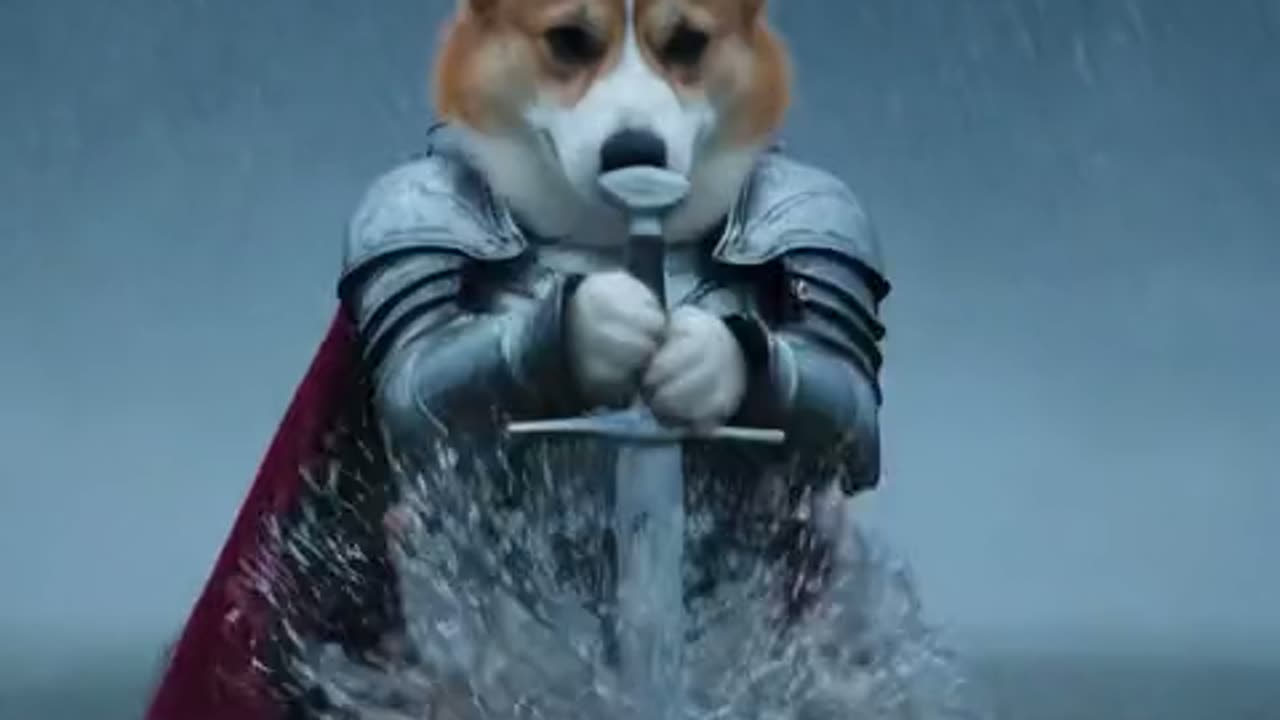
A Knight Cat AI render is already 9:16 vertical and about ten seconds long, which is the native shape of a short-form feed, so the work of publishing it to TikTok is mostly framing and text placement rather than reformatting. You upload one photo of your cat, pick a preset, the Seedance 2.0 model returns a private MP4, and you download that file and post it wherever you choose. This page covers the practical decisions that matter once the render exists: why the vertical output fits, how to choose what happens in the opening half-second, where captions and on-screen text should sit, and which areas of the frame are safe to use.
Why 9:16 output matches short-form feeds
Short-form video feeds on phones are taller than they are wide, because the device in your hand is taller than it is wide. A horizontal 16:9 clip placed in that feed either gets letterboxed with black bars above and below, or it gets cropped so that the left and right edges disappear. Neither is good. If you have ever watched a landscape clip on a phone and found the subject squeezed into a narrow strip in the middle of the screen, that is the cost of generating in the wrong aspect ratio.
A vertical 9:16 render has no such cost. It fills the screen edge to edge without cropping, which means the framing decisions you made in the prompt survive to the viewer. Nothing is cut off, nothing is padded, and the composition you saw in the studio preview is the composition the viewer sees. That is why vertical is the default delivery format here rather than an afterthought: the model is producing for the destination, not producing landscape and hoping you crop it later.
The second property that helps is length. A default render runs roughly ten seconds, with twelve seconds as the standard tier on the pricing cards. Ten seconds is short enough that the clip ends before attention drifts, and long enough to contain one clear beat. It also means the file is small, which matters when you are uploading from a phone on mobile data.
The output is exported as MP4 and carries no watermark, so the file is ready to hand to any app without a conversion step or an overlay to crop around.
What the studio produces
Before the framing details, it is worth being precise about what the tool gives you, because the constraints shape every decision below.
- One reference photo. Your cat or dog, uploaded once. The photo anchors the subject's fur pattern, face shape and markings so the pet stays recognisable while the wardrobe and setting change.
- One of four presets.
stormy_moor(Storm-swept moor),giant_protector(Tiny cat, giant knight),castle_gate(Castle gate at dusk) andmilk_guardian(Guardian of the milk). - 9:16 vertical output at around ten seconds, decoded by Seedance 2.0 and delivered as an MP4.
- Private renders. Nothing is published to a public feed. The video belongs to your account until you decide to post it.
You can run the whole flow from this page to see the shape of the result before you plan any edits around it.
This clip: 30 credits · 6 clips a month for $39.90 (Pro), or 80 a year for $319
Why the vertical frame fits the feed
Vertical composition changes what reads well. In a wide frame, a small subject can sit inside a large landscape and the environment does the storytelling. In a tall frame, the subject tends to occupy the middle band and the space above and below is atmospheric: sky, stone, torchlight, ground. This is why the presets that frame your pet prominently work so cleanly in vertical. A cat sitting in front of a bowl needs vertical space above it for the interior light and below it for the floor, and a 9:16 frame gives you both without cropping the animal.
The practical consequence is that you should think about the top and bottom thirds of the frame, not only the centre. If your prompt pushes the whole scene to fill the frame evenly, you lose the sense of depth that vertical composition gives you. If you let a tall structure such as a gate or a banner occupy the upper third, the frame reads as a place rather than a backdrop.
Choosing the opening half-second
The opening half-second is the part that decides whether a viewer stays. In a feed, that is roughly the first few frames of your clip, and there are only two things a viewer can register in that window: what they are looking at, and what is moving.
The most reliable opening is the preset that puts the animal large in frame at the first frame and shows one clear motion. milk_guardian and castle_gate both start with the pet centred and the camera stable, which means the first frame is legible immediately. giant_protector opens wider, so the first frame is more of an establishing shot than a subject shot, and it asks the viewer to read the scale relationship between the cat and the oversized knight before anything else registers. That can be dramatic, but it is a slower read.
Two rules help here. First, keep one action per shot. A shot that asks for two or three separate actions will smear or drop some of them, because the model is distributing a fixed frame budget across everything you requested. A single paw lift, a head turn, or a slow push-in all read clearly; all three at once do not. Second, prefer a locked-off camera for the opening beat. Camera language is a real parameter, and a moving camera spends generated frames on parallax and background displacement rather than on the subject, which leaves less budget for the animal. A static shot is more stable, and stability is what makes the first frame readable.
If you want a specific opening posture, the strongest lever is the reference photo, not corrective prompt text. Identity anchoring works from what the image actually contains, so a photo of the pose you want beats a sentence describing it. Extra limbs appear when the prompt implies a body pose the reference photo does not show, because the model has no image evidence for the hidden geometry and guesses. A clear reference pose plus a single action avoids most of that.
Captioning and on-screen text
Captions do two things: they let people watch with sound off, and they tell the viewer what they are looking at before the scene has time to explain itself. A knight cat is visually unusual, so a short caption earns its place.
Keep the sentence short. One line, roughly six to ten words, describing the scene rather than commenting on it. The caption should sit in the lower portion of the frame but above the interface furniture, which is why the safe-zone table below matters. If you are writing the caption yourself rather than letting the platform generate one, write it as a plain statement of what is happening on screen, and avoid stacking a second line of text elsewhere in the frame. Two text blocks competing in a ten-second clip splits attention.
There is one more consideration specific to this tool. The render has no watermark, so you are placing your own text on a clean image. That is an advantage, because you are not fighting an overlay in the corner, but it also means there is nothing in the frame to stop you from putting text exactly where the platform puts its own controls.
Safe areas, aspect and format guidance
Every short-form vertical feed draws interface elements over the video: buttons and captions on the right, a caption block and account name near the bottom, and a small amount of chrome at the top. Text you place inside those regions can be covered. The table below lists the regions of a 9:16 frame and how to treat them.
| Region of the 9:16 frame | Approximate band | What to put there | What to avoid | | ------------------------ | ------------------------------------- | ----------------------------------------------------- | ------------------------------------------- | | Top edge | Upper tenth | Sky, ceiling, distant stone, atmosphere | Text, since top chrome can overlap it | | Upper middle | Roughly tenth to fortieth percentile | The pet's head and the main tall element of the scene | Small fine detail you want read at a glance | | Centre band | Middle third | Your subject and its single action | Nothing, this is the working area | | Lower middle | Around two thirds down | A single line of caption text | A second competing text block | | Bottom edge | Lower tenth and the very bottom strip | Floor, ground shadow, gradient | Captions and text, where UI controls sit | | Right side, lower half | Vertical strip along the right | Scene content only | Text, where action buttons are drawn |
The safe conclusion is to treat the middle of the frame as yours and the extreme edges as borrowed. A caption placed slightly above centre-bottom, with a margin from both the left and right edges, survives across feeds and devices.
| Format property | Value for a Knight Cat render | Why it matters for posting | | --------------- | ------------------------------------------------------- | --------------------------------------------------------------------- | | Aspect ratio | 9:16 vertical | Fills a phone feed without letterboxing or cropping | | Container | MP4 | Accepted directly by short-form apps with no conversion | | Duration | Roughly 10s by default, 12s Standard | Short enough for a single beat, long enough to read a caption | | Resolutions | 480p (5 credits), 720p (10 credits), 1080p (30 credits) | 1080p default is the safe choice for a feed; 480p is fine for testing | | Watermark | None | No overlay to crop and no obstruction under your text |
Rendering at the right settings for a feed
Resolution is the setting that matters most for publishing, and the cost table is short. A 480p twelve-second render costs 5 credits, the 720p Standard render costs 10 credits, and the default 1080p delivery costs 30 credits. Longer clips scale linearly from the base rate and round up to a whole credit.
For a feed, the 1080p default is the straightforward choice: it is the delivery specification, it survives re-encoding by the platform, and it does not need upscaling. If you are still selecting a preset or testing a prompt, 480p at 5 credits gives you far more attempts for the same spend, which is the sensible way to experiment before committing to a full-resolution run. Current tiers are listed on the pricing page.
How you create the account changes what you can spend. Google sign-in grants 30 credits once, which covers exactly one 1080p default render. Email sign-up grants 0 immediately and builds from a daily check-in: 10 credits on the first check-in, 20 on the second, 30 on the third, then 10 credits for each of the next four, one per 24 hours. If a render fails, the credits for that attempt are refunded to the source balance, so a technical error does not cost you the balance you started with.
Sequencing several shots for one post
Ten seconds is one beat. If you want a post that shows the same cat in two or three moments, the reliable method is separate generations rather than one overloaded prompt, because a prompt asking for multiple actions will smear or drop some of them.
- Generate each beat as its own render, with one dominant action and, where possible, a reference photo that matches the intended pose.
- Download each MP4. Every render is private to your account and becomes yours to use at that point.
- Order the clips in an editor, keeping the strongest single shot first, since the opening beat is the one that decides whether the rest is watched.
- Keep the total runtime modest. Two or three ten-second beats is a coherent short post; five is a different format with different attention requirements.
- Place captions once, in the safe band, rather than on every clip in the sequence.
If you are building toward a specific visual identity for the same cat across posts, the approach in the prompt guide explains how to keep the scene language consistent between generations. For background on why the format itself is the subject of interest, the explainer on the trend covers the premise without any statistical claims.
Downloading and keeping the file
The MP4 download is the end of the pipeline on this side. Nothing about the render is published to a public feed, and no other account sees your output unless you choose to share the file yourself. That matters if you are uploading a photo you would not want indexed, and it also means the timing of a post is entirely your decision rather than a consequence of generating.
Keep the original MP4 rather than only the platform copy. Platforms recompress uploaded video, and a re-encode of a re-encode loses detail around fine texture such as fur and metal edges. The download walkthrough covers where the file lands and how to keep the highest-quality version. The main page has the sign-in and upload flow if you have not started yet, and the blog index lists the other guides.
FAQ
Do I need to crop or reformat the render before posting it to a short-form feed? No. The output is already 9:16 vertical and arrives as MP4, which is the shape and container these apps expect. Cropping it would remove the framing the model composed.
What should happen in the first half-second?
The subject should be large in frame with one clear action in motion. milk_guardian and castle_gate both open on a stable, centred subject, which is the easiest opening to read. Keep the shot to a single action and prefer a locked-off camera for that first beat.
Where can I safely put caption text? In the middle of the frame, slightly above the bottom third, with margins from the left and right edges. The very bottom strip is where feed controls are drawn and the right side of the lower half is where action buttons sit, so text there can be covered.
Is the video watermarked? No. There is no watermark on any render at any resolution, so there is no overlay to crop and nothing obscured beneath your caption.
How much does a render cost? 480p twelve-second output is 5 credits, the 720p Standard render is 10, and the default 1080p delivery is 30. Longer clips scale linearly from the base rate and round up to a whole credit.
Are renders visible to anyone else? No. Renders are private to the account that created them, with nothing published to a public feed. You decide when and where the file is posted.
Why did an extra limb appear in my clip? Almost always because the prompt implied a pose the reference photo did not show, so the model guessed the hidden geometry. Use a photo that matches the pose you want and reduce the shot to one action.