Knight Cat AI Video Generator: Photo to Knight Video
 Knight Cat AI Team
Upload one cat photo, pick a preset, and the Knight Cat AI video generator returns a private 9:16 MP4 of your pet as an armored knight with no watermark.
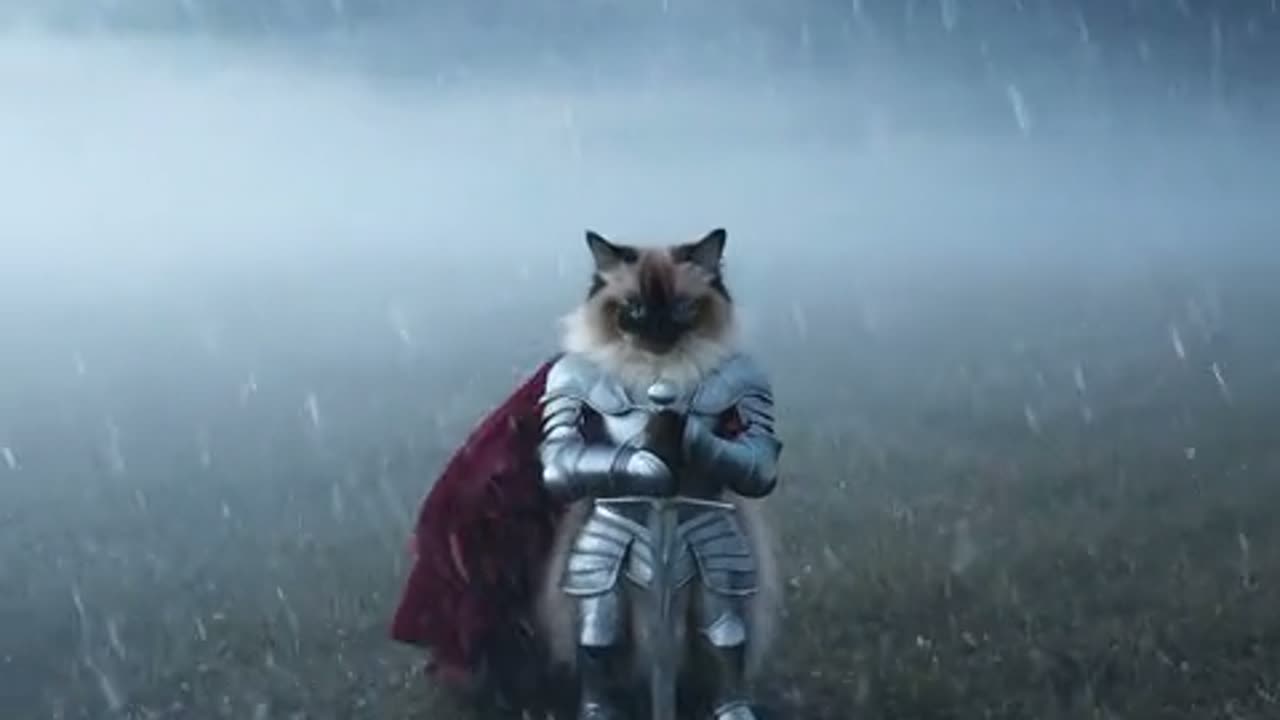
The Knight Cat AI video generator is a single-photo image-to-video tool: you upload one picture of your cat (or dog), choose one of four medieval presets, and the Seedance 2.0 model renders a roughly ten-second vertical 9:16 MP4 of that same pet dressed as a tiny armored knight. There is no timeline to assemble and no keyframes to place, because the model generates the motion itself from your reference photo plus the preset text. This page walks the whole pipeline end to end, from the upload to the downloaded file, and explains the mechanics that decide whether a render looks clean or comes back with a smeared paw or an extra leg.
What the generator actually is
It is not a video editor and not a slideshow maker. It is an image-conditioned video model wrapped in a small studio interface. Your photo is passed to the model as a subject reference, the preset supplies scene, wardrobe and camera direction, and the model decodes a short moving sequence that keeps your animal recognizable inside a new medieval setting.
Three properties matter for how you use it:
- One reference photo is the input. The stronger the photo, the more the model has to anchor to. A clear, well-lit shot of your cat against an uncluttered background gives the best result.
- The output is a short vertical clip. Default delivery is Standard · 1080p · 12s, formatted as 9:16 for phone screens, exported as MP4.
- Text-to-video is also supported. If you would rather describe a scene than upload a photo, you can prompt a knight-cat scene from text alone, though you lose the identity anchoring described further down.
The studio is the fastest way to see the flow in practice, and you can try it directly from this page.
This clip: 30 credits · 6 clips a month for $39.90 (Pro), or 80 a year for $319
The four presets and what each one renders
A preset is a bundle of scene text, lighting, wardrobe and camera behaviour that the model applies on top of your reference photo. You do not type any of it unless you want to add your own direction afterward.
| Preset id | English label | What it renders |
| ----------------- | ---------------------- | ----------------------------------------------------------------------------------------------- |
| stormy_moor | Storm-swept moor | Rain-lashed heath, low grey light, wind pushing the pet's fur, slow forward camera travel |
| giant_protector | Tiny cat, giant knight | Your pet small in frame beside an oversized armored figure that shields it, wide low-angle shot |
| castle_gate | Castle gate at dusk | Stone gateway, torchlight, banner movement behind the pet, static locked-off framing |
| milk_guardian | Guardian of the milk | A cat planted in front of a bowl or pail, sentinel posture, warm interior light, gentle push-in |
The presets differ mostly in how much body movement they imply. castle_gate and milk_guardian are the most forgiving, because they ask for a stable pose and small ambient motion. giant_protector is the most dramatic framing but the hardest, because it introduces a second large figure that must stay consistent across every frame. If you want to build your own direction rather than a stock preset, the approach in our prompt guide applies the same logic the presets use.
How a render works, step by step
- Upload the reference photo. One image, your cat or dog, ideally full body or front-facing with the face in focus.
- Pick a preset. This selects the scene, the armor treatment and the camera move. You can also supply extra text if you want a specific detail such as a colour of cloak or a particular stone wall.
- Choose the output resolution. 480p, 720p or 1080p. The default delivery is 1080p at 12 seconds.
- Start the render. Credits are drawn from your balance at that point.
- The model generates. Seedance 2.0 produces the motion frames, aligning your pet's markings to the new wardrobe and setting.
- Download the MP4. The result is private to your account, carries no watermark, and can be saved and reused as you like.
If a render fails, the credits for that attempt are returned to the balance it came from, so a technical failure does not cost you anything.
Identity anchoring: why the cat stays your cat
The reference photo does two jobs. It tells the model what the animal looks like, and it tells the model what geometry is available to animate. Identity anchoring is the first job: the fur pattern, face shape, eye colour and markings in your photo are pinned to the subject so that the model can change the wardrobe and the environment without changing the animal itself.
In practice this means the armor, the location and the lighting are free variables, while the pet's appearance is a constrained one. When the anchoring is weak, the subject drifts. You see it as a cat that looks generically correct but is not quite yours. That usually comes from a photo with a soft focus, heavy compression, or a busy background that the model cannot separate from the animal.
Wide shots weaken anchoring because the pet occupies fewer pixels. Tight or mid shots keep more detail on the face and body, which is why the presets that frame the pet prominently tend to preserve identity better than sweeping landscape compositions.
One action per shot
This is the single most useful rule for getting a clean clip. A shot that asks for two or three separate actions will smear or drop some of them, because the model is distributing a fixed number of generated frames across everything you asked for. Ask for a paw raise and a head turn and a step forward at once, and you will often get a blurred compromise where no action reads clearly.
Keep one dominant motion per shot. A sentinel stance with a slow push-in works. A single paw lift works. A walk across the frame works. Two of those stacked together in one twelve-second clip usually does not. Longer clips give the model more frames, but they do not remove the need to prioritise, because the same generation budget is still spread across every demand in the prompt.
If you need several beats, the reliable approach is separate generations rather than one overloaded prompt. You can then order them in an editor. Our walkthrough of the full workflow covers how to chain those shots so the sequence reads as one scene.
Why extra limbs appear
Extra limbs are the visible symptom of a body pose the reference photo never showed. If your photo is a seated front view and the prompt implies the cat is standing on its hind legs, the model has no image evidence for the hidden geometry of the legs and underside, so it guesses. Guessing is where duplicates come from: a second paw, a stray tail, an arm that belongs to nothing.
Three conditions make this more likely:
- The requested pose is far from the pose in the photo.
- The prompt names several interacting body parts at once.
- The framing is wide enough that the model must invent detail it cannot resolve.
A clear reference pose plus a single action avoids most of it. If you have a photo of the exact pose you want, use that photo. Matching the input to the intended output is more effective than adding corrective language to the prompt, because the prompt can only describe geometry while the photo actually contains it.
Camera language and stability
Camera moves are a real parameter in the pipeline, not decoration. Dolly, push-in and static framing all change how the model spends its generated frames. A moving camera spends frames on parallax and background displacement, which leaves less budget for the subject. A locked-off shot is more stable because the frame is fixed and every generated frame can be spent on the animal.
When a render looks fine in a still frame but shudders in motion, the usual cause is an aggressive camera move combined with an ambitious subject action. Pulling the camera back to static, or reducing the action to one clear beat, is the standard fix.
What a render costs in credits
Credits are consumed per generation and scale with resolution and clip length. Longer clips scale linearly from the base rate and round up to the next whole credit.
| Output | Length | Credits | | -------------------------------------------- | ------ | ------- | | 480p | 12s | 5 | | 720p (Standard, the figure on pricing cards) | 12s | 10 | | 1080p (default delivery spec) | 12s | 30 |
So a 480p twelve-second render costs 5 credits, the 720p Standard render costs 10, and the default 1080p delivery costs 30. A 24-second 1080p clip costs twice the base for that tier and rounds up to a whole credit if the arithmetic lands between two numbers. Current tiers and any add-ons are listed on the pricing page.
Signing in and building a starting balance
How you create the account determines what you begin with.
- Google sign-in grants 30 credits once, at the moment the account is created.
- Email sign-up grants 0 credits immediately. The balance comes from a daily check-in: 10 credits on the first check-in, 20 on the second, 30 on the third, then 10 credits for each of the next four check-ins, with one check-in allowed per 24 hours.
The check-in path is deliberately spread across days rather than handed over at once, so a single short session does not fund a full 1080p render. That matters if you are planning to test the 30-credit default output: a Google sign-in covers exactly one such render, while the email route reaches the same balance only after three separate days. If you want to stretch a small balance, 480p renders at 5 credits give you far more attempts for experimenting with prompts before committing to a high-resolution run.
Privacy, watermarks and refunds
Every render is private to the account that created it. Nothing is published to a public feed, and no other user sees your output unless you choose to share the file yourself. This is worth knowing if you are uploading a photo you would not want indexed anywhere.
There is no watermark on any render, at any resolution. The MP4 you download is clean and can be posted directly to a social platform or dropped into an edit without cropping or overlay removal.
Failed renders are refunded to the source balance. If a generation errors out, you keep your credits and can retry. You are charged for a completed generation, not for an attempt.
FAQ
Does the generator need a photo, or can I just describe what I want? Both paths exist. Uploading a photo is what enables identity anchoring, so your animal stays recognisable. Text-to-video works without a photo but produces a generic knight cat rather than your specific pet.
How long does a render take? The clip itself is roughly ten to twelve seconds long. Rendering runs on the studio's remote renderers, and the finished clip appears in your account when it completes; higher resolutions and longer durations take more work than the standard settings.
Why did my cat come back with an extra paw? Almost always because the prompt implied a pose the reference photo did not show. The model invents the hidden geometry and sometimes duplicates it. Use a reference photo that matches the pose you want and reduce the shot to a single action.
Can I use the video commercially? The file is yours to download and use, with no watermark and no public publishing step. Check the terms of service for the formal terms rather than relying on a summary here.
What is the best preset for a first attempt?
castle_gate or milk_guardian, because both ask for a stable pose and small ambient motion, which is the easiest combination for the model to render cleanly. Save giant_protector for when you have a prompt and reference photo you already trust.
Where do I start? Sign in, upload one clear photo, and run a 480p render to check that the identity anchoring is holding before you spend 30 credits on the 1080p default. The main page and the FAQ article cover the remaining setup questions.